Ktaxon 10×30 Party Tent Instructions: A Comprehensive Guide
This guide provides detailed instructions for assembling and maintaining your Ktaxon 10×30 party tent, ensuring a successful event with proper setup and care.
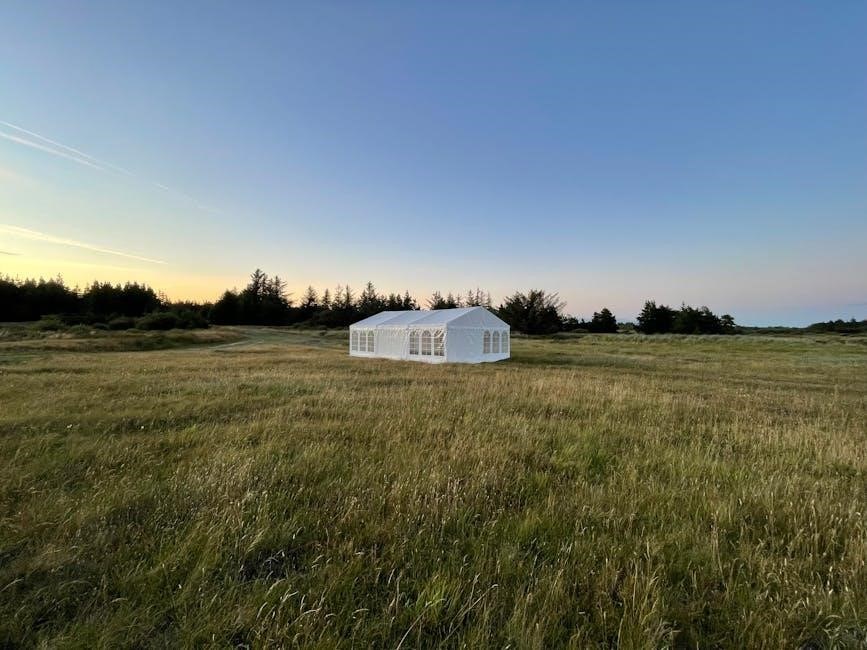
The Ktaxon 10×30 party tent is a versatile solution for outdoor events, offering ample space for gatherings like weddings, parties, and camping trips. Constructed with a durable iron frame and waterproof PE cloth covering, this gazebo provides reliable shelter from the elements.
Featuring eight removable sidewalls – including options with windows and zip doors – the tent adapts to various weather conditions and preferences. Its easy-to-assemble design, utilizing a spiral tube installation system, allows for quick setup with minimal tools. This tent is designed for both convenience and stability, ensuring a secure and enjoyable experience for you and your guests.
Proper installation and maintenance, as detailed in this guide, will maximize the tent’s lifespan and performance.
Unboxing and Parts Inventory
Upon receiving your Ktaxon 10×30 party tent, carefully inspect the package for any signs of damage during shipping. Once opened, lay out all components and cross-reference them with the parts list included in the package. You should find iron frame sections of varying diameters (31mm, 24mm, 18mm), a 90G/M2 PE cloth covering, and PE plastic connectors.
Verify you have all eight sidewalls – six with windows and two with zip doors. Ensure the English instruction manual is present. Missing parts should be reported immediately to the retailer. Familiarizing yourself with each component before assembly will streamline the process and prevent frustration. A complete inventory ensures a smooth and successful setup.
Materials Used in Construction

The Ktaxon 10×30 party tent is constructed using a combination of durable materials designed for weather resistance and stability. The frame utilizes iron tubing in three different diameters – 31mm, 24mm, and 18mm – providing a robust structural foundation. The tent’s covering is crafted from 90G/M2 PE (Polyethylene) cloth, offering waterproof and UV protection.
Additionally, PE plastic connectors are employed to join the frame sections securely. The sidewalls are also made from 90G PE polyethylene, ensuring consistent weather protection. The top covering utilizes 100g polyethylene for enhanced durability. These materials balance affordability with the necessary performance for outdoor events, providing a reliable shelter.
Iron Frame Components
The Ktaxon 10×30 party tent’s frame is the backbone of its structure, built with varying diameters of iron tubing for optimal strength and support. You’ll find three sizes: 31mm, providing the primary load-bearing capacity; 24mm, offering secondary support and connection points; and 18mm, used for bracing and smaller frame sections.
This tiered system ensures stability against wind and weather. The iron components are designed for relatively easy assembly, utilizing PE plastic connectors to create a secure and interconnected framework. Proper connection of these iron pieces is crucial for the tent’s overall integrity and safety during use, guaranteeing a sturdy shelter for your event.
90G/M2 PE Cloth Covering
The Ktaxon 10×30 party tent utilizes a 90G/M2 polyethylene (PE) cloth covering, chosen for its balance of durability, water resistance, and UV protection. This fabric weight indicates a robust material capable of withstanding moderate weather conditions. The PE cloth is designed to shield guests from the elements, providing a comfortable environment for outdoor gatherings.
Importantly, the covering is waterproof, preventing rain from penetrating the tent. Additionally, the UV protection helps to minimize sun exposure. Regular cleaning is recommended to maintain its effectiveness and appearance. The white color reflects sunlight, further enhancing comfort inside the tent, making it ideal for various events.
PE Plastic Connectors
The Ktaxon 10×30 party tent assembly relies on durable polyethylene (PE) plastic connectors to join the iron frame components. These connectors are specifically designed for ease of use and secure connections, facilitating a relatively straightforward setup process. They play a crucial role in the tent’s structural integrity, ensuring stability during use.
These connectors are lightweight yet strong, contributing to the overall portability of the tent. It’s vital to ensure all connectors are firmly engaged during assembly, as loose connections can compromise the tent’s stability, especially in windy conditions. Proper tightening is key to a safe and enjoyable event.

Assembly Instructions: Step-by-Step
Follow these instructions carefully for a quick and efficient setup: laying out the frame, connecting sections, attaching the roof, and securing sidewalls.
Step 1: Laying Out the Frame
Begin by carefully unpacking all frame components. Identify the various iron tubes – 31mm, 24mm, and 18mm in diameter – as specified in the product details. Lay these pieces out on a flat, protected surface to prevent damage.
Start with the base frame sections, arranging them to form the 10×30 foot rectangular shape. Ensure all connectors are readily accessible. It’s helpful to have an assistant during this stage, especially given the tent’s size. Double-check that you have all the necessary parts before proceeding. A systematic approach will streamline the assembly process and minimize frustration. Refer to the included English instruction manual for a visual diagram of the frame layout.

Step 2: Connecting the Frame Sections
Utilize the PE plastic connectors to join the iron frame sections. The Ktaxon tent features a user-friendly spiral tube installation system, designed for a steady and secure frame. Insert the tubes firmly into the connectors, ensuring a snug fit.
Begin connecting the base frame, then move upwards to construct the vertical supports and roof frame. Apply even pressure during connection to avoid bending or damaging the tubes. Periodically check for stability as you build, making adjustments as needed. Tighten all connections; loose connections compromise the tent’s structural integrity. Remember, a helper is invaluable for this step, maintaining alignment and providing support.
Step 3: Attaching the Roof Covering

Carefully drape the 90G/M2 PE cloth roof covering over the assembled frame. Ensure the covering is centered, allowing for equal overhang on all sides. Secure the roof using the provided Velcro straps or ties, attaching it to the frame at multiple points.
Begin at the peak and work your way down the sides, smoothing out any wrinkles as you go. This ensures a taut and waterproof surface. Pay close attention to the corners, securing them firmly to prevent flapping in the wind. The roof material is waterproof, but proper attachment is crucial to prevent leakage. Double-check all connections for a secure fit.
Step 4: Securing the Side Walls
Attach the side walls to the tent frame using the Velcro straps or hooks provided. Begin with one corner and work your way around the perimeter, ensuring each wall is securely fastened. The Ktaxon tent often includes 8 removable sidewalls, offering versatile configurations.
Utilize the walls with windows for enhanced visibility and airflow, or opt for walls with zip doors for convenient access. Ensure the zippers are fully closed during inclement weather. Properly attached side walls provide protection from the elements and enhance the tent’s stability. Regularly inspect the connections to maintain a secure enclosure.
Attaching Removable Side Walls
To attach the removable side walls, locate the Velcro straps or hooks along the tent frame and the corresponding fasteners on the wall panels. Align the wall with the frame and firmly press the fasteners together, ensuring a secure connection. Start at a corner and proceed systematically around the tent perimeter.
The Ktaxon 10×30 tent often features multiple wall options, allowing for customized configurations. Double-check that each wall is taut and properly aligned before fully securing it. This prevents gaps and maximizes protection from wind and rain. Regularly inspect the attachments, especially during use, to maintain stability.
Using Walls with Windows
Walls equipped with windows offer enhanced visibility and natural light within the Ktaxon 10×30 party tent. These walls attach similarly to standard removable walls, utilizing Velcro straps or hooks to connect to the tent frame. Ensure the window coverings, if included, are properly positioned for desired privacy or light control.
When attaching windowed walls, pay attention to the orientation – decide which direction you want the view to face. Regularly check the window material for any tears or damage. These walls provide a pleasant atmosphere while still offering protection from the elements, making them ideal for daytime events.
Utilizing Walls with Zip Doors
Walls featuring zip doors provide convenient access points to your Ktaxon 10×30 party tent, enhancing functionality for events with frequent entry and exit. These walls connect to the frame using Velcro or hooks, similar to other wall types. Ensure the zippers operate smoothly before and during the event.
Properly align the door wall with the tent frame for a secure fit. Regularly inspect the zippers for any damage or obstructions. Zip doors are particularly useful for catering, serving areas, or creating separate entry/exit flows. They offer controlled access while maintaining the tent’s enclosed space.

Securing the Tent for Stability
Properly securing your Ktaxon tent with ropes and tent pegs is crucial, especially in windy conditions, to prevent damage and ensure guest safety.
Using Ropes and Tent Pegs
Securing your Ktaxon 10×30 party tent with ropes and tent pegs is paramount for stability, particularly when exposed to the elements. Begin by attaching the ropes to the designated loops located along the tent’s frame. Ensure each rope is tautly stretched outwards from the tent, creating an even distribution of tension.
Next, firmly drive the tent pegs into the ground at a 45-degree angle, away from the tent. The pegs should be deeply embedded to provide a secure anchor. For enhanced stability, especially on softer ground, consider using longer or spiral-shaped tent pegs. Regularly check the ropes and pegs throughout your event, re-tightening or re-securing as needed to counteract any loosening caused by wind or ground movement. Don’t forget to tie the ropes and use tent pegs to fix it!
Reinforcing Against Wind and Rain
To safeguard your Ktaxon 10×30 party tent against inclement weather, implement additional reinforcement measures. Beyond ropes and pegs, consider utilizing sandbags or weights placed on the inside of the tent legs for increased stability during windy conditions. Ensure the 90G/M2 PE cloth covering is securely fastened to the frame, checking for any loose connections.
The waterproof PE material offers protection, but proper tensioning is crucial to prevent water pooling. Regularly inspect the tent for any potential weak points or areas where water might seep through. Avoid using the tent on excessively windy or rainy days, as even reinforced structures have limitations. Prioritize safety and consider relocating the event if severe weather is anticipated.
Maintenance and Care
Regular cleaning of the PE cloth and proper storage are essential for extending the life of your Ktaxon 10×30 party tent, ensuring future use.
Cleaning the PE Cloth Covering
Maintaining the PE cloth covering is crucial for longevity. Regularly inspect the 90G/M2 PE cloth for dirt, debris, and mildew. For light cleaning, a gentle wash with mild soap and water is recommended. Use a soft brush or sponge to avoid damaging the material.
Avoid harsh chemicals or abrasive cleaners, as these can degrade the waterproof and UV-protective properties of the polyethylene. Rinse thoroughly with clean water to remove all soap residue. Allow the covering to air dry completely before storing or reassembling the tent.
For stubborn stains, a specialized tent cleaner may be used, following the manufacturer’s instructions carefully. Promptly address any mildew growth to prevent further damage. Consistent cleaning will help preserve the tent’s appearance and functionality for numerous events.
Storing the Tent Properly
Proper storage is essential to extend the life of your Ktaxon 10×30 party tent. Before storing, ensure the PE cloth covering is completely dry to prevent mildew growth. Disassemble the frame and carefully separate all components – iron tubes, PE plastic connectors, and the cloth covering.
Store the tent in a cool, dry, and well-ventilated area, away from direct sunlight and extreme temperatures. Keep it protected from pests and rodents. Consider using the original packaging or a large storage bag for organization.
Avoid storing the tent in damp basements or outdoor sheds where moisture can accumulate. Regularly check the stored tent for any signs of damage or deterioration. Following these guidelines will ensure your tent remains in excellent condition for future use.
Troubleshooting Common Issues
Addressing issues promptly ensures your Ktaxon 10×30 party tent remains functional. If you experience frame instability, double-check all connections are secure and the tent is on level ground. Ensure all tubes are fully inserted into the connectors.
For water leakage, inspect the PE cloth covering for any tears or punctures and repair them with appropriate patching material. Verify the roof is taut and properly secured. Remember the fabric is waterproof, but seams can be vulnerable.
If sidewalls don’t align, re-examine the attachment points and ensure correct orientation. Tighten any loose Velcro or ties. Always refer to the instructions for proper assembly.
Frame Instability
A wobbly or unstable frame is a common concern, but easily addressed. First, meticulously re-examine every connection point – ensure all iron frame components are fully inserted into the PE plastic connectors. Confirm the spiral tube installation system is correctly engaged, providing a steady base.
Uneven ground significantly contributes to instability. Relocate the tent to a level surface or use shims under the legs to compensate. Tighten all connectors; a loose connection weakens the entire structure.

Remember, a helpful assistant during setup is recommended for optimal frame alignment. Don’t force connections; ensure proper alignment before applying pressure.
Water Leakage
Despite the 90G/M2 PE cloth and 100g Polyethylene top being waterproof, leakage can occur. Inspect the roof covering for any tears or punctures; repair with appropriate patching materials. Ensure the covering is tautly secured to the frame, eliminating slack where water can pool.
Seams are potential weak points; Consider applying seam sealer along all seams for enhanced water resistance. When attaching sidewalls, overlap them sufficiently to prevent water from seeping through the gaps.
Proper tent pitch is crucial; ensure adequate slope for water runoff. Avoid setting up the tent in areas prone to water accumulation. Remember, don’t use the tent during heavy rainfall if instability is a concern.