
Home electrical wiring diagrams are essential for renovations or new builds, offering a visual guide to power distribution within a residence.
What is a Home Wiring Diagram?
A home wiring diagram is a visual representation of the electrical system within a house, detailing the layout of circuits, components, and connections. Think of it as a blueprint for your home’s electricity. These diagrams utilize standardized symbols to illustrate elements like outlets, switches, light fixtures, the electrical panel, and the wiring pathways connecting them all.
Crucially, a diagram isn’t just a pretty picture; it’s a technical document. It shows how everything is connected, enabling safe troubleshooting, modifications, or even a complete system overhaul. A well-prepared diagram is invaluable for both experienced electricians and informed homeowners undertaking DIY projects, ensuring compliance with safety standards and local electrical codes.
Why You Need a Home Wiring Diagram
Possessing a home wiring diagram is paramount for several reasons. Firstly, it’s indispensable for safe electrical work, preventing accidental shocks or fires during repairs or additions. Secondly, it simplifies troubleshooting; identifying the source of an electrical issue becomes significantly easier with a clear visual guide.
Furthermore, a diagram is crucial when renovating or expanding your home, ensuring new circuits integrate seamlessly with the existing system. It also proves invaluable during a home sale, providing potential buyers with a comprehensive understanding of the electrical infrastructure. Ultimately, a diagram empowers you to manage your home’s electrical system confidently and safely.
Understanding Electrical Symbols
Home wiring diagrams utilize standardized symbols to represent electrical components, ensuring clarity and consistency. A receptacle is typically depicted as two parallel lines with a small gap, while a switch is shown as an angled line interrupting a straight line. Ground wires are represented by a curved or hooked line, signifying their safety function.
Understanding these symbols is crucial for interpreting diagrams accurately. Different line types indicate different wire types – solid for standard wiring, dashed for conduit. Familiarizing yourself with these conventions unlocks the ability to decipher complex electrical plans and perform safe, informed electrical work within your home.

Basic Home Wiring Components
Essential elements include the electrical panel, various wiring types, receptacles providing power access, and switches controlling electrical flow throughout the home.
Electrical Panel (Breaker Box)
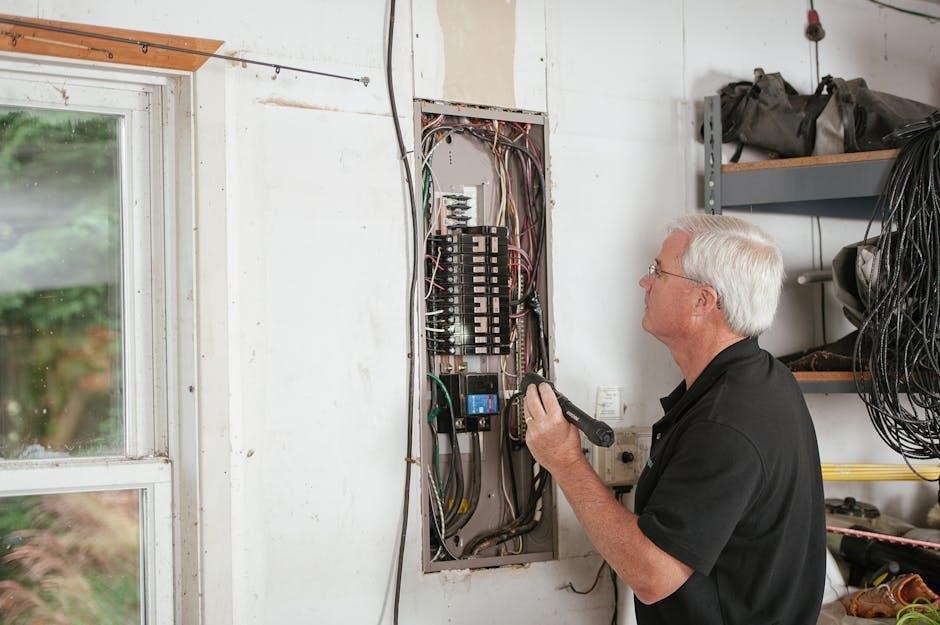
The electrical panel, often called a breaker box, serves as the central distribution point for your home’s electrical system. It receives power from the utility company and safely distributes it throughout the house via circuits. Wiring diagrams clearly illustrate how each circuit connects to the panel, showing the location of breakers controlling specific areas or appliances.
Understanding your electrical panel is crucial for safety and troubleshooting. Each breaker is rated for a specific amperage, protecting the circuit from overloads. A home wiring diagram will detail these ratings. Proper labeling of breakers is vital; diagrams aid in accurate labeling. The main breaker controls all power to the panel, allowing for complete shutoff during emergencies or maintenance. Inspecting the panel regularly for any signs of damage or corrosion is essential for maintaining a safe electrical system.
Wiring Types (NM-B, THHN, etc.)
Various types of electrical wiring are used in residential applications, each suited for specific purposes. NM-B (nonmetallic sheathed cable) is common for interior wiring, while THHN/THWN is often used inside conduit. A comprehensive home wiring diagram will specify the correct wiring type for each circuit, ensuring compliance with electrical codes and safety standards.
Understanding wire gauge (thickness) is also critical; larger gauges handle higher amperage. Diagrams indicate the appropriate gauge for each circuit based on its load. Different insulation colors denote hot, neutral, and ground wires – a home wiring diagram clearly identifies these. Selecting the right wiring type and gauge is paramount for preventing overheating and electrical hazards, and diagrams are essential for proper installation.
Receptacles (Outlets)
Electrical receptacles, commonly known as outlets, provide access to electrical power throughout a home. A detailed home wiring diagram illustrates receptacle placement, circuit assignments, and wiring configurations. Standard 15-amp and 20-amp receptacles are used for general purpose applications, while specialized outlets like GFCI (Ground Fault Circuit Interrupter) are required in wet locations like kitchens and bathrooms.
Diagrams clearly show how to connect the hot, neutral, and ground wires to the appropriate terminals on the receptacle. Proper wiring is crucial for safety and functionality. A home wiring diagram will also indicate if receptacles are controlled by switches or are always live, ensuring correct installation and operation.
Switches
Electrical switches control the flow of electricity to lights and other fixtures. A comprehensive home wiring diagram details switch locations, types (single-pole, three-way, four-way), and their corresponding circuit connections. Single-pole switches are used to control a light from one location, while three-way switches allow control from two locations – common in hallways and stairwells.
The home wiring diagram illustrates how to connect the line, load, and traveler wires to the switch terminals. Correct wiring is vital for safe and reliable operation. Diagrams also show if switches control multiple fixtures or are part of a more complex lighting scheme, ensuring accurate installation and functionality;

Creating a Home Wiring Plan
Developing a detailed home wiring plan, often visualized with a diagram, is crucial before any electrical work begins, ensuring safety and efficiency.
Assessing Your Electrical Needs
Before diving into a home wiring diagram, a thorough assessment of your electrical requirements is paramount. Begin by cataloging all existing and planned appliances, lighting fixtures, and electronic devices. Consider their wattage or amperage draw – this information is typically found on the appliance label.
Account for future needs, such as potential additions of smart home technology or increased appliance usage. Determine dedicated circuits for high-demand appliances like refrigerators, ovens, and air conditioners.
A detailed inventory, coupled with an understanding of electrical load calculations, will form the foundation of a safe and efficient wiring plan. Ignoring this step can lead to overloaded circuits and potential hazards.
Calculating Load Requirements
Accurately calculating electrical load requirements is crucial for designing a safe and functional home wiring system. Begin by summing the wattage of all lights and appliances on each circuit. Remember to use the continuous load formula – 125% of the total wattage for continuous loads (running for 3+ hours).
The National Electrical Code (NEC) dictates maximum allowable loads for branch circuits, typically 15 or 20 amps for general-purpose circuits.
Dedicated circuits are required for high-demand appliances. Proper load calculation prevents overloaded circuits, ensuring safe operation and compliance with electrical codes, all reflected in your wiring diagram.
Mapping Out Circuit Layouts
Once load calculations are complete, meticulously map out circuit layouts on your home wiring diagram. Group lights and outlets based on their function and location, aiming for balanced loads across circuits. Prioritize essential circuits – kitchen, bathrooms, laundry – and plan for future expansion.
Consider the physical layout of your home, minimizing wire runs and avoiding potential obstructions.
Clearly indicate circuit numbers, wire gauges, and device locations on the diagram. A well-planned layout enhances safety, efficiency, and simplifies troubleshooting, ensuring a robust electrical system.

Wiring Diagrams for Common Areas
Detailed diagrams illustrate electrical setups for kitchens, bathrooms, bedrooms, and living rooms, showcasing receptacle, switch, and lighting configurations within each space.
Kitchen Wiring Diagram
Kitchen circuits demand careful planning due to the high concentration of appliances. A typical kitchen diagram illustrates dedicated circuits for refrigerators, dishwashers, microwaves, and countertop outlets, often utilizing 20-amp breakers.
GFCI (Ground Fault Circuit Interrupter) protection is crucial for all kitchen outlets near water sources. The diagram will show how these outlets are wired, ensuring safety.
Lighting circuits are often separate, including general illumination and under-cabinet lighting. Detailed diagrams clarify wiring for switches controlling these lights. Understanding the diagram helps ensure proper functionality and adherence to electrical codes, preventing overloads and hazards.
These diagrams often include details about appliance placement relative to outlets.
Bathroom Wiring Diagram
Bathroom wiring prioritizes safety due to the presence of water. A comprehensive diagram will showcase GFCI (Ground Fault Circuit Interrupter) protection for all outlets, safeguarding against electrical shock. Dedicated circuits are typically required for exhaust fans, lights, and potentially electric heaters.
The diagram illustrates the wiring for these components, including switch locations and connections to the electrical panel. Proper grounding is paramount, clearly depicted in the diagram.
Outlets near sinks and tubs must be GFCI protected, a detail emphasized in the diagram. Understanding the diagram ensures compliance with electrical codes and minimizes the risk of electrical hazards in this sensitive area of the home.
Detailed views show wiring for vanity lights and heated floors.
Bedroom Wiring Diagram
A typical bedroom wiring diagram focuses on general lighting and receptacle placement. Standard layouts include outlets along walls, spaced to accommodate furniture, and a ceiling light fixture controlled by one or more wall switches. The diagram clearly shows the wiring path from the electrical panel to each component.
Dedicated circuits aren’t always required for bedrooms, but are recommended if the room will house significant electronic devices. The diagram will illustrate the wire gauge and breaker size appropriate for the circuit load.
Smoke detector wiring is also crucial and will be detailed on the diagram, ensuring proper interconnection with other detectors in the home.
Outlets for bedside lamps and charging devices are commonly included.
Living Room Wiring Diagram
A living room wiring diagram typically illustrates multiple circuits to handle various loads – lighting, entertainment systems, and general appliances. Outlets are strategically placed around the perimeter and potentially within the room to accommodate furniture arrangements and device usage.
Dedicated circuits are often included for high-demand devices like televisions or home theater systems, ensuring stable power delivery. The diagram will specify wire gauges and appropriate breaker sizes for each circuit.
Wall switch locations for multiple lighting zones are clearly marked, potentially including dimmer switches for adjustable ambiance.
Consideration for future expansion, like adding speakers or smart home devices, should be reflected in the diagram.

Specific Wiring Configurations
Advanced setups, like three-way or four-way switches, GFCI outlets, and AFCI breakers, require detailed diagrams for correct and safe installation procedures.
Three-Way Switch Wiring
Three-way switches allow controlling a light fixture from two different locations, commonly used in hallways or staircases. Understanding the wiring involves a traveler wire connecting the two switches, alongside the hot, neutral, and ground wires. A typical diagram illustrates how the power source connects to one switch, the light fixture to the other, and the travelers facilitate switching between them.
Correct wiring is crucial; misconnections can lead to malfunctioning or safety hazards. Diagrams often depict the switch terminals clearly labeled – common, traveler 1, and traveler 2 – guiding installers. Online resources and electrical code books provide detailed diagrams and instructions for safe and compliant installation. Always disconnect power before working with wiring, and consult a qualified electrician if unsure.
Four-Way Switch Wiring
Four-way switches extend the control of a light fixture to three or more locations, often found in larger homes or hallways. These systems utilize two three-way switches at the ends and one or more four-way switches in between. A diagram reveals the complex interplay of traveler wires connecting all switches, enabling switching from multiple points.
Understanding the wiring requires careful attention to traveler wire connections; incorrect connections can disrupt functionality. Detailed diagrams, available in electrical code books and online databases, illustrate the proper configuration. Safety is paramount – always de-energize the circuit before working on the wiring. If the complexity feels overwhelming, consulting a qualified electrician is highly recommended.
GFCI Outlet Wiring
GFCI (Ground Fault Circuit Interrupter) outlets are crucial safety devices, particularly in wet locations like bathrooms and kitchens. A wiring diagram illustrates how a GFCI outlet protects against electrical shock by quickly interrupting power when a ground fault is detected. The diagram shows the line and load terminals, crucial for proper connection and protecting downstream outlets.
Correct wiring is vital; miswiring can render the GFCI ineffective. Online resources and electrical code books provide detailed diagrams. Remember to always disconnect power before wiring. Testing the GFCI monthly with its test button ensures continued functionality. If unsure, a qualified electrician should perform the installation or inspection to guarantee safety and code compliance.
AFCI Breaker Wiring
AFCI (Arc Fault Circuit Interrupter) breakers enhance home electrical safety by detecting dangerous arcing faults, a leading cause of electrical fires. A detailed wiring diagram showcases how the AFCI breaker interrupts power when an arc is identified, preventing potential hazards. Understanding the line and load side connections, as depicted in the diagram, is essential for correct installation.
Proper wiring ensures the AFCI functions as intended; incorrect connections can compromise its protective capabilities. Consult online databases and electrical code books for accurate diagrams. Always de-energize the circuit before working on the breaker. Regular testing confirms the AFCI’s operational status. When in doubt, engage a licensed electrician for safe and compliant installation.

Safety Considerations
Prioritize safety when working with electricity; always disconnect power before wiring, adhere to local codes, and ensure proper grounding for a secure system.
Working with Electricity Safely
Electrical work presents inherent dangers, demanding strict adherence to safety protocols. Before commencing any wiring project, always disconnect the power supply at the main electrical panel, verifying it’s off with a non-contact voltage tester. Never assume a wire is de-energized; treat every wire as live until proven otherwise.
Utilize insulated tools specifically designed for electrical work, and wear appropriate personal protective equipment, including safety glasses and rubber-soled shoes. Avoid working in damp or wet conditions, as water significantly increases the risk of electric shock.
If you’re unfamiliar with electrical wiring, consult a qualified electrician; attempting repairs beyond your skill level can lead to serious injury or fire hazards. A thorough understanding of a home wiring diagram is crucial, but doesn’t replace professional expertise when needed.
Local Electrical Codes and Permits
Electrical wiring is heavily regulated to ensure safety and standardization. Before starting any electrical work, research and understand your local electrical codes, as they vary by jurisdiction. Many projects require permits from your local building department, ensuring inspections are conducted to verify compliance with safety standards.
Failing to obtain necessary permits can result in fines and require rework to meet code requirements. A detailed home wiring diagram is often required as part of the permit application process, demonstrating your planned work adheres to regulations.
Always prioritize code compliance, even if it adds to the project’s cost or complexity; it safeguards your home and family. Consult with your local building department for specific requirements.
Grounding and Bonding
Grounding and bonding are critical safety components of any electrical system, providing a path for fault current to safely return to the source, minimizing shock hazards. Grounding connects to the earth, while bonding connects metallic parts to create an equipotential plane. Your home wiring diagram must clearly illustrate these connections.
Proper grounding and bonding help prevent dangerous voltage buildup on appliance casings and metal pipes. The National Electrical Code (NEC) dictates specific requirements for grounding and bonding, which must be followed diligently.
Incorrect grounding or bonding can render safety devices ineffective, increasing the risk of electrical shock or fire. Always consult a qualified electrician if you are unsure about these critical aspects of electrical wiring.

Troubleshooting Common Wiring Issues
A home wiring diagram is invaluable when diagnosing electrical problems, like tripped breakers or faulty outlets, aiding safe and effective repairs.
Identifying Blown Fuses/Tripped Breakers
When lights flicker or appliances stop working, a blown fuse or tripped breaker is often the culprit. Your home wiring diagram becomes a crucial tool in quickly pinpointing the affected circuit. The diagram clearly labels each circuit and its corresponding breaker in the electrical panel.
Visually inspect the fuse or breaker – a blown fuse will have a broken filament, while a tripped breaker will be in an “off” or intermediate position. Referencing the diagram ensures you’re addressing the correct circuit, preventing accidental disconnection of essential systems. Always prioritize safety; turn off the main power before investigating or replacing fuses/resetting breakers. A clear diagram minimizes guesswork and promotes safe troubleshooting.
Diagnosing Outlet Problems
A non-functional outlet can stem from various issues, and your home wiring diagram is invaluable for systematic diagnosis. The diagram reveals which breaker controls the problematic outlet, allowing for a quick check for tripped breakers. If the breaker is fine, the diagram helps trace the wiring path back to the electrical panel, identifying potential junction boxes or connections along the way.
Using a voltage tester, carefully check for power at the outlet, referencing the diagram to understand the hot, neutral, and ground wire locations. A lack of power indicates a wiring fault upstream, while power present suggests an outlet-specific issue. Always prioritize safety and disconnect power before any physical inspection.
Fixing Switch Malfunctions
When a light switch fails, a home wiring diagram becomes crucial for safe and effective repair. The diagram illustrates the switch’s wiring configuration – single-pole, three-way, or four-way – guiding you through the correct troubleshooting steps. Begin by verifying the breaker controlling the switch is not tripped. Then, with the power safely disconnected, use the diagram to identify the line, load, and traveler wires.
A faulty switch can often be identified with a multimeter, checking for continuity. If the switch is defective, replace it, carefully connecting the wires according to the diagram. Incorrect wiring can create hazards, so meticulous attention to detail is paramount.

Resources for Home Wiring Diagrams (PDF)
Numerous online databases and electrical code books offer downloadable home wiring diagrams in PDF format, aiding in safe and compliant installations.
Online Wiring Diagram Databases
Several websites specialize in providing free and paid home wiring diagrams in PDF format; These databases often categorize diagrams by fixture type, room, or specific electrical configurations, making it easier to find relevant information. Many offer interactive diagrams allowing users to trace circuits and understand connections better.
Popular resources include websites dedicated to electrical engineering and DIY home improvement. Some manufacturers also provide downloadable wiring schematics for their products. Always verify the diagram’s accuracy and ensure it aligns with your local electrical codes before implementation. Remember that online resources should supplement, not replace, professional guidance when dealing with electrical work.
Electrical Code Books
National and local electrical code books, like the National Electrical Code (NEC), are invaluable resources for accurate home wiring diagrams and regulations. These books contain detailed illustrations and guidelines for safe and compliant electrical installations. While not always presented as simple PDFs, they offer the most authoritative information on wiring methods, component specifications, and safety standards.
Understanding code requirements is crucial for any electrical project. Code books often include sample diagrams illustrating proper grounding, circuit protection, and wiring techniques. Accessing the latest edition of your local code book ensures your wiring adheres to current safety protocols and avoids potential hazards or legal issues.
Manufacturer’s Wiring Diagrams
Specific appliances and electrical devices often come with their own detailed wiring diagrams provided by the manufacturer. These diagrams, frequently available as PDFs on the manufacturer’s website or within the product’s documentation, are essential for correct installation and troubleshooting. They illustrate the specific wiring configurations required for that particular model, including voltage, amperage, and connection points.

Always prioritize manufacturer’s diagrams over generic guides when installing or repairing a specific appliance. These resources ensure compatibility and prevent damage to the device or your home’s electrical system. Ignoring these instructions could void warranties and create safety risks.
Future-Proofing Your Home Wiring
Planning ahead with extra capacity and conduit ensures your home’s electrical system can easily adapt to evolving technology and increased power demands.
Planning for Smart Home Devices
Integrating smart home technology requires careful consideration during the wiring phase. Many smart devices, such as smart thermostats, lighting systems, and security cameras, demand a consistent power supply and reliable network connectivity.
When creating your home wiring plan, anticipate the locations of these devices and ensure sufficient outlets are available, potentially including dedicated circuits for higher-demand appliances.
Consider running Ethernet cables alongside electrical wiring to provide a stable network connection, bypassing potential Wi-Fi limitations. Future-proofing involves anticipating increased bandwidth needs and incorporating smart device compatibility into your overall electrical infrastructure. A well-planned wiring diagram is crucial for seamless smart home integration.
Adding Extra Capacity
Over time, electrical demands often increase with new appliances and technologies. Planning for extra capacity during initial wiring prevents future overloads and costly renovations. A comprehensive home wiring diagram should include spare circuits in key areas like the kitchen, living room, and garage.
Consider increasing the amperage of your electrical panel to accommodate potential future needs. Dedicated circuits for high-power devices, such as electric vehicles or air conditioners, are essential.
Properly calculating load requirements and incorporating buffer capacity into your wiring plan ensures a safe and reliable electrical system capable of handling evolving demands, avoiding frequent breaker trips and potential hazards.
Using Conduit for Flexibility
Employing electrical conduit – rigid or flexible tubing – offers significant advantages during home wiring. It protects wires from physical damage and simplifies future modifications or upgrades. A detailed home wiring diagram should clearly indicate conduit runs and connection points.
Conduit allows for easy wire replacement without disturbing walls or ceilings, proving invaluable when technology evolves. It’s particularly useful in unfinished areas like basements or attics.
Choosing the appropriate conduit type (EMT, PVC, or flexible metal conduit) depends on the application and local electrical codes, ensuring a safe and adaptable electrical infrastructure for years to come.